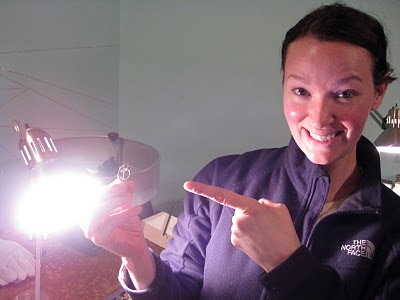
I'm sure you've heard of wicked stepmothers....but have you even heard of wicked stepdaughters? Because that is exactly what I am.
No, this is not one of mine. This is my stepmom's wedding ring. I've had this thing held hostage here in my studio for at least half a year. Leaving my poor mother wedding ring-less (or as she likes to call it "without her shackle"). Terrible. I've been wanting to size it up and put a new half shank on it. But when I got it sawed in two and prepared to solder on the new shank, it wouldn't solder, no matter what I tried. I think I am being too conservative with the heat because I am afraid of ruining something that has a lot of sentimental value. The ruby, in particular, worries me because it has inclusions. Which I think add to its loveliness, but they do make it more likely to crack when heat is applied. I think the stone will need to be removed. But I'm going to take it to someone who specializes in repairs, because I'm just too close to this thing. It's like a surgeon who can't operate on family (or something like that....).
Meanwhile, I couldn't leave my mom shackle-less, could I? And exposed to the advances of strange men at the grocery store? Not I! So I made her something pretty to wear while I get the ring repaired:
Monday, December 28, 2009
Wednesday, December 23, 2009
Finally!
Dearest readers, If you have seen the last few posts you know that I have been struggling to get my casting operation up and running. I have so many new ideas in my head that are dying for a chance to make it into metal form and I have several pieces in my current collection that are much easier to make by casting rather than by hand fabrication. Well.... I did it! Or, I guess I should say "we did it!", because my faithful Shop Monkey was there assisting, and he managed to snap this very unflattering photo just after the event:
Man, am I happy. I can't even explain how happy I am. I've done casting before, but always under someone more experienced who was "in charge". This was the first successful casting that I did under my power. There is a difference. (On an unrelated note, for all of you jewelry junkies out there who might think making jewelry is glamorous....check me out above. That is pretty much how I look at work. Grubby, hot, hair pulled back, with dirty fingers. Not terribly glam.)
And it worked!
First I took a lot more care with my wax carving:
I don't know why it is, but somehow I automatically assume that when the ring comes out in metal it will magically be better than the wax. But that is not the case. You have to make the wax as perfect as you possibly can, because any flaws will be exaggerated even more in the metal and you will spend so much time finishing the final product that it makes it not even worth it to cast it in the first place. Checking the proportions:
I thought I had done a really good job on these waxes, but it turned out that every little file mark on the wax was a hundred thousand times more pronounced in the metal. So I spend a lot of time filing and sanding the next day. Live and learn. I then invested the molds and burned out the wax. I think what was key for the success here was that I bought a new casting machine:
This is a centrifugal casting machine. You wind it up and then heat your metal in an attached crucible. When the metal is almost ready, you have your Shop Monkey remove the flask from the super hot kiln and place it on the swing arm inside the drum. After you have pushed the exit hole of the crucible up against the mouth of the flask you let the arm swing around, forcing the molten metal in the mold. It works like a charm, and I trust it so much more than the vacuum casting method. The unfinished results:
They look pretty rough here, and I think I need to get higher heat investment. I talked to Jeff Hoover (at Hoover and Strong, my metal guys), and he suggested the centrifugal machine and different type of investment for the palladium white gold that I use a lot of. He said what I have for now is fine, but it would be better to get the other stuff when I run out. I have a 100lbs of it, so I don't know how soon that will be.... But here is the finished product!
Sapphires, diamonds, moissanite! I love stones!
Thursday, December 10, 2009
I won't lie
I got into making jewelry for the stones, not for the metal.
But I don't want to limit myself. So I'm really going to try to focus a little more on the metal. Not too much, since I adore (and that is not hyperbole) stones. For example, the little raw pendant pictured above and below. I could have left it plain, it was simple and lovely plain. But I couldn't! I had to (HAD TO) add a stone.
But these! I restrained myself and left them plain. Although I do think I will be adding stones to them in the future. Maybe just small shiny ones....maybe one or two sparkly ones set into one of the columns. Maybe.....
(Although, 18kt gold is winning me over to the metal side slowly but surely. )
I've always been a magpie, ever since I was little. I love shiny things, especially if they are translucent. I have a huge collection of marbles. Yes, I own jars (that's plural, I won't tell you just how many) of marbles. I like clear things and things that shine and things that sparkle. So my first priority when I started learning goldsmithing, was not so much the goldsmithing, but more the stone setting. I guess I sort of viewed the metal as the delivery method for the stones. I still do sort of feel that way (as my designs can attest), but I'm getting more into the metal stuff. I don't think (actually, I KNOW) that I wouldn't be doing this if it weren't for shiny pretty stones.But I don't want to limit myself. So I'm really going to try to focus a little more on the metal. Not too much, since I adore (and that is not hyperbole) stones. For example, the little raw pendant pictured above and below. I could have left it plain, it was simple and lovely plain. But I couldn't! I had to (HAD TO) add a stone.
But these! I restrained myself and left them plain. Although I do think I will be adding stones to them in the future. Maybe just small shiny ones....maybe one or two sparkly ones set into one of the columns. Maybe.....
Thursday, December 3, 2009
Ok, I'm over it
Ok, I've gotten over my little disappointment from Monday. I can't be upset about things I have no control over. I did write the guy, but he didn't respond. Oh well. I want to thank everybody who left some really nice comments, it's crazy how nice people can be. I'm always surprised when things aren't going too well and I blog about it, and then I get lovely support from people. Strangers are awesome!
Monday, November 30, 2009
Etsy and other "artists"
So, ever since I joined etsy there has been this other jeweler (actually 3 other jewelers), that seemed to be picking up ideas from my website. Ideas like jewelry designs. I let it go and tried not to let it bother me until I found this:
Let me give you a side by side comparison (the two below are mine and predate the picture above):
I realize that there is nothing that I can do about this. But it makes me really really really angry, since I had never seen anything like my pebble rings when I started making them. Now this guy on etsy thinks he can just lift whatever he wants from my shop and use it in his own. And you know what!? He can. It almost makes me want to leave Etsy and just sell to stores. I wonder what he does...do you think he stops by every month or so looking for new designs? Perhaps I should just make it easier for and send him my design sketch book. That way he could be ahead of the game.
Ok, I'm done being petulant. But really, I sort of wonder why he didn't just save himself the trouble of photographing and just download the pictures from my etsy site.
The worst part about this sort of stuff is that it really takes the joy out of what I do. It really just saps me of all my creative energy and joy.
Tuesday, November 24, 2009
Setting and Polishing!
FIRE! Okay, fire doesn't have anything to do with setting stones, but I'm involved in a passionate (and reckless) love affair with my torch. Which is a meco midget. For all of you jewelry people out there, this torch IS SO MUCH BETTER THAN THE MINI TORCH. You can find it here.
What happens to wood if you drop something hot on it.
Ok, here is a picture of a ring after I have cut a seat for the stone that I am working with. I use what is called a bud bur (you can use a ball bur as well) in my flex shaft.
In this picture I have already inserted the stone and moved some metal down over the girdle.
Inspecting!
Jewelry people! These are magic! Magic! Highly recommended. Shofu polishing wheel, knife edge. You can get them here. I like both the brownie and the greenie. Won't hurt most hard stones, but keep them off of peridot and amethyst.
Thursday, November 19, 2009
Monday, November 16, 2009
Casting Excruciation
Not exactly what I was hoping for. I did something wrong, obviously. Or many things wrong, perhaps. I was aiming for something more like this:
This is what I think happened:
Diagnosis:
1) Casting flask temperature was too cool. 900ºf was not hot enough for this particular alloy. After a long chat with Jeff Hoover at Hoover and Strong today, I now realize that I need to increase the flask temperature to 1150º.
2) Sprue was too large and long. Slightly shorter sprue, smaller diameter.
3) Sprue location was wrong. I'm not quite sure how to sprue towards the setting though. I'll have to experiment. Perhaps not in gold, though. :-|
4) I did try to do two casting last night, with my lovely assistant, who was instrumental in drying my tears after the second try didn't turn out:
The first one was even less successful than the second, if you can believe it. This was due to my premature, over-eager metal pour. Seriously felt stupid on this one, when the metal just plugged up the hole because it wasn't even properly liquid. Silly. Mental note, count to 2 mississippi after the metal has reached liquidus. Also heat the beejesus out of the crucible before adding metal. Think red hot. HOT!
4) Take more care with wax carving. I'm fairly new to the wax carving scene and I totally used the wrong kind of wax on my first carving (see above). It was too sticky and hard to work with. The second carving was much, much better, but was lost in the first disastrous casting attempt.
I was so disappointed last night that not even a Hagen Daaz bar and two episodes of Battle Star Galactica could ease my anguish. But at least nothing exploded. (Besides my head, that is.)
Holidays! Holidays! Holidays!
Saturday, November 14, 2009
The Big Day
Dearest singleB readers, if you have been following my blog you will know that I am the proud owner of a new casting set up. I purchased said set up forever ago and have yet to really use it. But that is all going to change today. As I type this, I have two molds in the kiln, steadily burning away the wax carvings inside. Everything is prepared for casting at around 5pm tonight. I'm incredibly nervous, and I don't know why. The worst thing that will happen is that they won't cast all the way, or that the mold will blow out (which I don't think will happen since I was very careful to make the end of mold pretty thick). But I am using an alloy that melts at the very margin of what the investment (plaster of paris like stuff that forms the mold) specifications can handle. So I'm a tad nervous about that. That darn palladium white gold that everyone loves. I think I might get some special investment for high temp. metals if this doesn't work out. I would also be incredibly disappointed and would have to tell the two customers whose projects they are that I will have to delay further. Which would be bad business...I hate to delay things even further.
Wax carving area. Messy with tools.
Sharp pokey and scrapey things to carve with.
Little wax detailers. Like little saw blades/files with a handle
Electric wax pen. That little metal tip can be heated to different temperatures by turning that dial on the blue box. The tips can be changed as well.
Carving on sprue in casting flask.
Investment in mixing bowl.
Two molds that have been poured and are drying out.
Okay, I will let you know how it goes later today. Nervous nervous nervous!
And because I like pretty pictures:
Wednesday, November 11, 2009
I love custom
Plain:
Fancy:
Preferences, anyone? I'm torn. At first I really liked the plain, but then I added the sapphires in the bands and wasn't so sure anymore.
I never use photoshop on my photos, sometimes good lighting does all the work for you. You really can't beat natural light, which here in the NW is a little scarce during the winter. I'm not quite sure what to do on cloudy days...sometimes I can't wait for the sun to come out to take a photo of a piece. Suggestions?
Monday, November 9, 2009
Vacuum Update
Ok, so I switched on the vacuum table for the first time today. And after causing it to make a loud popping sound and shoot something out of the side of the machine, I switched it off and consulted the pamphlet that came with it. Turns out you need to unscrew the top of the investment table to get to this pump thing inside it. So that meant I needed a screw driver. Which, you would think I have, but I don't. Sue me. Luckily enough, my studiomate had one. Ok, top off, pump accessed. Well, because of my ill judged switch on of the machine, I'm not quite sure what popped off (I'm not sure what it is called anyway) or where it is. But I found three separate pieces and assembled them and put them back in to the best of my ability. They looked like a little plastic window, and a rubber gasket along with a marker for where the oil level is. That brings me to the oil. So this monstrosity was shipped with a big bottle of oil (I think it was even labeled "vacuum oil"...you would never guess that I have a relatively high IQ and speak Chinese fluently. I got an A in calculus in college, I swear it). So this oil needs to go into the vacuum pump before you turn it on....or bad things happen. Like loud noises that scare the bejeesus out of a person. Luckily enough, I didn't break my new expensive toy before I had a chance to use it. I poured the oil in and reassembled and: voila! Room temperature water boiling in a vacuum. Yay!
And it's a Go!!!
Dearest readers, after much frustration and terrible ineptitude on the part of a witless comcast flunky this morning (poor man, had no idea what he was doing. 2.5hrs!), I finally have my own internet and no longer have to steal it from one of my neighbors. Coffee, pugs, and etsy emails. Ah, Monday.
This week is the big week (and not just dinner with the boyfriend's parents...wish me luck). I am determined to get my casting stuff up and going. It's a terrible shame that I've let it go so long. So I've taken a few pictures to illustrate just what I'm up against.
Kiln! Please note the open manual just in front of it. Programmable, but only if you are a crusty old goldsmithing man with a large white beard.
Crucible. I had debated about getting a metal melting furnace, but I decided to try a casting torch first.
It may say EZ, but I'm not sure it will be. Maybe after I've put it through it's paces a couple of times I will figure it all out. I think I will need to get a helper for the actual casting part since I'm not sure I should be melting metal while I get the mold out of the kiln. I might start something on fire.
Crazy fine dust stuff that is sort of like plaster of paris, but much more dangerous to your health. I have to wear a crazy respirator when I use. I mix it up with water and then pour it over my wax models. When it hardens and the wax is burned out, I then have a mold to pour the metal in.
Ok, no design Monday today. Too much stuff to do and I didn't feel creative with the comcast guy here all morning. But maybe next week...
Next post, holiday banner!
Subscribe to:
Posts (Atom)